
17 Feb Managing Cisco AnyConnect on Apple Systems

Overview
The Cisco AnyConnect Virtual Private Network (VPN) client connecting to a virtual private network will make remote resources of another networks available in a secure way as if the user were connected directly to that “private” network. The Cisco AnyConnect VPN client provides remote users with secure VPN connections to the Cisco appliances using the Secure Socket Layer (SSL) protocol and the Datagram TLS (DTLS) protocol. The Cisco AnyConnect provides more than just VPN it can also provide endpoint software services. It also offers enhanced security through various built-in modules. These modules provide services that include compliance through the VPN and Cisco Identity Services Engine (ISE) posture along with web security, network visibility, off-network protection, and the Network Access Manager.

Client Support
AnyConnect clients are available across a broad set of platforms, including Windows, Mac OS X, Linux, iOS, Android, Windows Phone, BlackBerry, and Google Chrome.
For Apple systems, support depends on your Cisco appliance model and client software & operating system version being used and supported.
iOS Requirements & Compatibility
- iPad Air – iOS 7.0 or later
- iPad 2 – iOS 6.0 or later
- iPad (3rd generation) – iOS 6.0 or later
- iPad (4th generation) – iOS 6.0 or later
- iPad mini – iOS 6.0 or later
- iPad mini (with Retina display) – iOS7.0 or later
- iPad-Pro – iOS 9.0 or later
- iPhone 3GS – iOS 6.0 – 6.1.6
- iPhone 4 – iOS 6.0 – 7.1.2
- iPhone 4S – iOS 6.0 or later
- iPhone 5 – iOS 6.0 or later
- iPhone 5C – iOS 7.0 or later
- iPhone 5S – iOS 7.0 or later
- iPhone 6 – iOS 8.0 or later
- iPhone 6 Plus – iOS 8.0 or later
- iPhone 6s – iOS 9.0 or later
- iPhone 6s Plus – iOS 9.0 or later
- iPod Touch (4th generation) – iOS 6.0 – 6.1.6
- iPod Touch (5th generation) – iOS 6.0 or later
Mac Requirements & Compatibility
- Supported Operating Systems
- macOS 10.12
- Mac OS X 10.11
- Mac OS X 10.10
- Supported Modules
- VPN Client – Yes
- Network Access Manager – No
- Cloud Web Security – Yes
- VPN Posture (HostScan) – Yes
- ISE Posture – Yes
- DART – Yes
- Customer Experience Feedback – Yes
- Network Visibility Module – Yes
- AMP Enabler – Yes
- Umbrella Roaming Security – Yes
- Supported Operating Systems
- macOS 10.12
- Mac OS X 10.11
- Mac OS X 10.10
- Mac OS X 10.9
- Supported Modules
- VPN Client – Yes
- Network Access Manager – No
- Cloud Web Security – Yes
- VPN Posture (HostScan) – Yes
- ISE Posture – Yes
- DART – Yes
- Customer Experience Feedback – Yes
- Network Visibility Module – Yes
- AMP Enabler – Yes
- Umbrella Roaming Security – Yes
- Supported Operating Systems
- Mac OS X 10.11
- Mac OS X 10.10
- Mac OS X 10.9
- Mac OS X 10.8
- Supported Modules
- VPN Client – Yes
- Network Access Manager – No
- Cloud Web Security – Yes
- ASA Posture – Yes
- ISE Posture – Yes
- DART – Yes
- Customer Experience Feedback – Yes
- Supported Operating Systems
- Mac OS X 10.10
- Mac OS X 10.9
- Mac OS X 10.8
- Supported Modules
- VPN Client – Yes
- Network Access Manager – No
- Cloud Web Security – Yes
- ISE Posture – Yes
- DART – Yes
- Customer Experience Feedback – Unknown
- Supported Operating Systems
- Mac OS X 10.7 x86(32-bit) and x64(64-bit)
- Mac OS X 10.6 x86(32-bit) and x64(64-bit)
Download
Mac Download
- Directly from Cisco
To download the Cisco AnyConnect client directly from Cisco, you need a login and a valid service contract, else you will see the following message.

- University of Utah
For the University of Utah affiliated people (i.e. student, staff, faulty) you can download the software from the campus Office of Software Licensing Web Site:

- Shop for Software
Click “SHOP FOR SOFTWARE” button.

- Search for Software
Enter “VPN”, “Cisco” or “AnyConnect” in search box.

- Details
In the search results section, click on the “DETAILS” button.


- Select License Type
Select license type (student, staff/faculty or university) and platform (Mac, Windows or Linux)


- Add
After selecting license type and platform, click the “ADD” button

- My Cart
Unless you want to shop for additional software, click the “CHECK OUT” button

- Sign In
Next, click the “SIGN IN” button at the top of the web page and enter your university network ID (uNID) and password.


- Download
Next, under “MY ACCOUNT” click “Downloads”

Then click “Download Now”

Then download software, they Mac download will be a disk image (i.e. *.dmg)

iOS Download
The Cisco AnyConnect iOS client is available free from the Apple iOS store for iPhone’s & iPad’s:
https://itunes.apple.com/us/app/cisco-anyconnect/id392790924?mt=8

Installation
Mac Installation
- Initial Install
For the first installation, you need administrative privileges. Depending on if your environment allows end-users have administrative privileges or if your environment has an administrator that uses a tool or system to manage your system configuration and software distribution this might or might not be an issue.

- Update
However, subsequent auto-updates do not require a user entering in administrator level privileges. Depending on the Cisco appliance and customization of the client installation, the clients can automatically be updated based on the client version setup on the appliance. This could cause issues if there isn’t a quality assurance (QA) or testing process for client software distribution where the administrator of the Cisco appliance updates the client software without communicating or testing with client systems administrators.

The basic process is that the client software will connect to the appliance with new client software, it will download & install the new software and reconnect after the update is completed.
There is an executable called “vpndownloader” and two scripts, “install-dmg.sh” & “vpndownloader.sh” that install the update with root permissions.
/opt/cisco/anyconnect/bin/vpndownloader.app/Contents/MacOS/vpndownloader
For example, here is the “install-dmg.sh” script…
#!/bin/sh
# Script for installing DMG packges for AnyConnect, intended for invocation by Downloader

BASH_BASE_SIZE=0x00000619
CISCO_AC_TIMESTAMP=0x0000000057f698d9
CISCO_AC_OBJNAME=install-dmg.sh
# BASH_BASE_SIZE=0x00000000 is required for signing
# CISCO_AC_TIMESTAMP is also required for signing
# comment is after BASH_BASE_SIZE or else sign tool will find the comment

readonly RET_PARAM_ERROR=1
readonly RET_DMG_ERROR=2
readonly RET_PKG_ERROR=3

LOG_FACILITY="install.notice"
LOG_TOPIC="install-dmg.sh"

log()
{
    logger -p "$LOG_FACILITY" -t "$LOG_TOPIC" $1
}

if [ "x${1}" != "x" ]; then
    DMG=$1
    PKG=$(basename "${1%.*}").pkg
else
    echo "$0 <path to AnyConnect disk image> <AnyConnect installer name>" | log
    exit ${RET_PARAM_ERROR}
fi

echo "Installing ${PKG} from ${DMG}" | log

# Mount the DMG and take note of mount path
echo "hdiutil attach ${DMG} -nobrowse -noverify" | log
HDIUTILOUT=$(hdiutil attach ${DMG} -nobrowse -noverify) || exit ${RET_DMG_ERROR}

MOUNTPATH=$(echo "${HDIUTILOUT}" | egrep -o "(/Volumes/.*)")

# this will be invoked when we trap exit
unmount_dmg()
{
    # Unmount the DMG
    echo "hdiutil eject ${MOUNTPATH} -force" | log
    hdiutil eject "${MOUNTPATH}" -force || exit ${RET_DMG_ERROR}
}
trap unmount_dmg EXIT

# Execute the installer
echo "installer -pkg \"${MOUNTPATH}/${PKG}\" -target \"/\" -verbose" | log
installer -pkg "${MOUNTPATH}/${PKG}" -target "/" -verbose || exit ${RET_PKG_ERROR}

# Finished!
echo "Finished installing ${PKG}" | log

exit 0
For example, here is the “vpndownloader.sh” shell script…
#!/bin/bash
#

BASH_BASE_SIZE=0x00161fb1
CISCO_AC_TIMESTAMP=0x0000000057f698dc
CISCO_AC_OBJNAME=vpndownloader.sh
# BASH_BASE_SIZE=0x00000000 is required for signing
# CISCO_AC_TIMESTAMP is also required for signing
# comment is after BASH_BASE_SIZE or else sign tool will find the comment

MARKER=$((`grep -an "[B]EGIN\ ARCHIVE" $0 | cut -d ":" -f 1` + 1))
MARKER_END=$((`grep -an "[E]ND\ ARCHIVE" $0 | cut -d ":" -f 1` - 1))
if which mktemp >/dev/null 2>&1; then
  DOWNLOADERLOCATION=`mktemp -d /tmp/vpn.XXXXXX`
  RMTEMP="yes"
  chmod a+x ${DOWNLOADERLOCATION}
else
  DOWNLOADERLOCATION="/tmp"
fi

DOWNLOADER_SCRIPT_PATH="$(cd "$(dirname "$0")"; pwd)/$(basename "$0")"
DOWNLOADER_SCRIPT_COPY_PATH="${DOWNLOADERLOCATION}/$(basename "$0")"

FILELIST=`head -n ${MARKER_END} $0 | tail -n +${MARKER} | gzip -dc - | tar xvf - -C ${DOWNLOADERLOCATION} --no-same-owner` || exit 1

cp "${DOWNLOADER_SCRIPT_PATH}" "${DOWNLOADER_SCRIPT_COPY_PATH}"

cd ${DOWNLOADERLOCATION}

ERRVAL=0
DOWNLOADER_ARGS=$*
DOWNLOADER_ARGS="${DOWNLOADER_ARGS%\"}"
DOWNLOADER_ARGS="${DOWNLOADER_ARGS#\"}"

DOWNLOADER_ARGS+="	-dl=${DOWNLOADER_SCRIPT_COPY_PATH}"

${DOWNLOADERLOCATION}/vpndownloader.app/Contents/MacOS/vpndownloader \""${DOWNLOADER_ARGS}"\" || ERRVAL=$?

rm -rf ${DOWNLOADER_SCRIPT_COPY_PATH}

rm -rf ${FILELIST}
cd - > /dev/null
if [ ${RMTEMP} = "yes" ]; then
  rm -rf ${DOWNLOADERLOCATION}
fi

exit ${ERRVAL}
At the University of Utah, a central group is planning to install the newest client using the VPN concentrator on the day that two factor authentication (2FA) is implementation (i.e. Duo Security) which will be required on campus for staff/faculty virtual private network access. If you want to manage the updates of the Cisco AnyConnect client software, and you can’t coordinate a testing or release schedule with your VPN administrator, you can disable automatic updates on the mac client systems by editing an XML file on the client. See below for details…
- Manual Installation
At the University of Utah, the manual installation would be as follows:
Download Software
Download client system software from campus software licensing web site.
Open Disk Image
Open the disk image and you will see the following window:

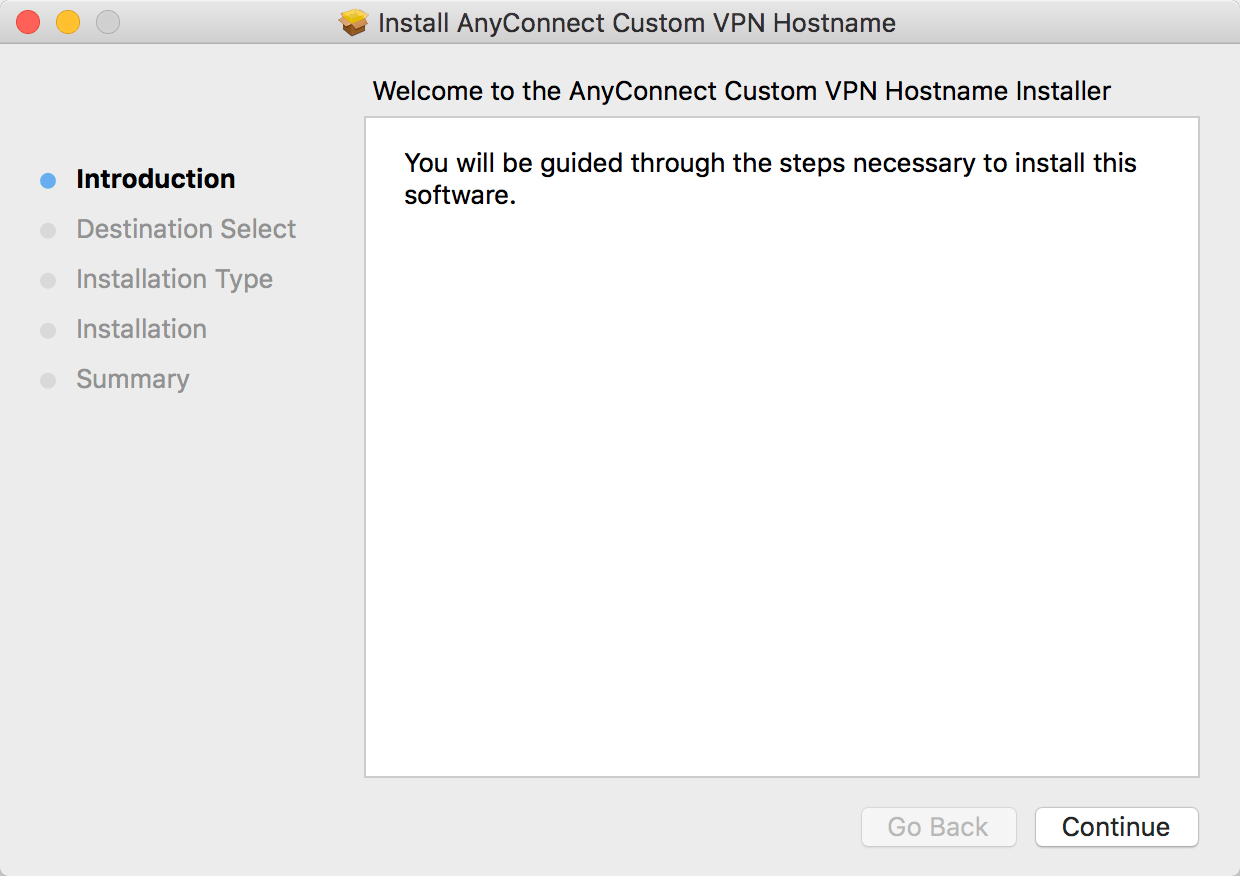
Open Installer Package
Open the installer package and you will see the following:


- Web Security
Installs the WebSecurity module that enables cloud scanning of web content to protect against malware and enforce acceptable use policies via the ScanSafe cloud proxies.
- AMP Enabler
Installs the AMP Enabler module that downloads and deploys AMP for Endpoints, as configured by the administrator.
- Diagnostics and Reporting Tool
Installs the diagnostics module that collects AnyConnect Secure Mobility Client troubleshooting information.
- Posture
Installs the module that provides the AnyConnect Secure Mobility Client with the ability to identify the operating system, antivirus, anti-spyware, and firewall software installed on the host prior to creating a remote access connection to the secure gateway.
- ISE Posture
Installs the module that provides the AnyConnect Secure Mobility Client with the functionality needed to authenticate to wired or wireless networks controlled by the Identity Services Engine, including examination and any needed remediation of the connecting host environment.
- Network Visibility
Installs the Network Visibility Module which collects application telemetry data.
- Umbrella Roaming Security
Installs the module that enables Umbrella Roaming Security.
The University of Utah doesn’t support these additional features of Cisco AnyConnect, so, it is recommended to disable all custom install options except the VPN install.


Enter administrator credentials

If installation was successful you will see the following window:

- Install Using Command Line
You can use the command line, which which will greatly ease distribution and allow for automation.
Default Install
After you have download the Cisco AnyConnect, you can use the following command:
sudo installer -pkg "/path/to/AnyConnect.pkg" -target "/path/to/target"

Password:
installer: Package name is AnyConnect Secure Mobility Client
installer: Installing at base path /
installer: The install was successful.
Note: This will be the default install including all the selected install choices.
- Customize Installation
Custom Install with Install Choices
To get the installer package install choices, you can use the following command:
installer -showChoiceChangesXML -pkg "/path/to/AnyConnect.pkg"
For example:
installer -showChoiceChangesXML -pkg "/path/to/AnyConnect.pkg"

<?xml version="1.0" encoding="UTF-8"?>
<!DOCTYPE plist PUBLIC "-//Apple//DTD PLIST 1.0//EN" "http://www.apple.com/DTDs/PropertyList-1.0.dtd">
<plist version="1.0">
<array>
	<dict>
		<key>attributeSetting</key>
		<true/>
		<key>choiceAttribute</key>
		<string>visible</string>
		<key>choiceIdentifier</key>
		<string>choice_vpn</string>
	</dict>
	<dict>
		<key>attributeSetting</key>
		<false/>
		<key>choiceAttribute</key>
		<string>enabled</string>
		<key>choiceIdentifier</key>
		<string>choice_vpn</string>
	</dict>
	<dict>
		<key>attributeSetting</key>
		<integer>0</integer>
		<key>choiceAttribute</key>
		<string>selected</string>
		<key>choiceIdentifier</key>
		<string>choice_vpn</string>
	</dict>
	<dict>
		<key>attributeSetting</key>
		<true/>
		<key>choiceAttribute</key>
		<string>visible</string>
		<key>choiceIdentifier</key>
		<string>choice_websecurity</string>
	</dict>
	<dict>
		<key>attributeSetting</key>
		<false/>
		<key>choiceAttribute</key>
		<string>enabled</string>
		<key>choiceIdentifier</key>
		<string>choice_websecurity</string>
	</dict>
	<dict>
		<key>attributeSetting</key>
		<integer>1</integer>
		<key>choiceAttribute</key>
		<string>selected</string>
		<key>choiceIdentifier</key>
		<string>choice_websecurity</string>
	</dict>
	<dict>
		<key>attributeSetting</key>
		<true/>
		<key>choiceAttribute</key>
		<string>visible</string>
		<key>choiceIdentifier</key>
		<string>choice_fireamp</string>
	</dict>
	<dict>
		<key>attributeSetting</key>
		<false/>
		<key>choiceAttribute</key>
		<string>enabled</string>
		<key>choiceIdentifier</key>
		<string>choice_fireamp</string>
	</dict>
	<dict>
		<key>attributeSetting</key>
		<integer>1</integer>
		<key>choiceAttribute</key>
		<string>selected</string>
		<key>choiceIdentifier</key>
		<string>choice_fireamp</string>
	</dict>
	<dict>
		<key>attributeSetting</key>
		<true/>
		<key>choiceAttribute</key>
		<string>visible</string>
		<key>choiceIdentifier</key>
		<string>choice_dart</string>
	</dict>
	<dict>
		<key>attributeSetting</key>
		<false/>
		<key>choiceAttribute</key>
		<string>enabled</string>
		<key>choiceIdentifier</key>
		<string>choice_dart</string>
	</dict>
	<dict>
		<key>attributeSetting</key>
		<integer>1</integer>
		<key>choiceAttribute</key>
		<string>selected</string>
		<key>choiceIdentifier</key>
		<string>choice_dart</string>
	</dict>
	<dict>
		<key>attributeSetting</key>
		<true/>
		<key>choiceAttribute</key>
		<string>visible</string>
		<key>choiceIdentifier</key>
		<string>choice_posture</string>
	</dict>
	<dict>
		<key>attributeSetting</key>
		<false/>
		<key>choiceAttribute</key>
		<string>enabled</string>
		<key>choiceIdentifier</key>
		<string>choice_posture</string>
	</dict>
	<dict>
		<key>attributeSetting</key>
		<integer>1</integer>
		<key>choiceAttribute</key>
		<string>selected</string>
		<key>choiceIdentifier</key>
		<string>choice_posture</string>
	</dict>
	<dict>
		<key>attributeSetting</key>
		<true/>
		<key>choiceAttribute</key>
		<string>visible</string>
		<key>choiceIdentifier</key>
		<string>choice_iseposture</string>
	</dict>
	<dict>
		<key>attributeSetting</key>
		<false/>
		<key>choiceAttribute</key>
		<string>enabled</string>
		<key>choiceIdentifier</key>
		<string>choice_iseposture</string>
	</dict>
	<dict>
		<key>attributeSetting</key>
		<integer>1</integer>
		<key>choiceAttribute</key>
		<string>selected</string>
		<key>choiceIdentifier</key>
		<string>choice_iseposture</string>
	</dict>
	<dict>
		<key>attributeSetting</key>
		<true/>
		<key>choiceAttribute</key>
		<string>visible</string>
		<key>choiceIdentifier</key>
		<string>choice_nvm</string>
	</dict>
	<dict>
		<key>attributeSetting</key>
		<false/>
		<key>choiceAttribute</key>
		<string>enabled</string>
		<key>choiceIdentifier</key>
		<string>choice_nvm</string>
	</dict>
	<dict>
		<key>attributeSetting</key>
		<integer>1</integer>
		<key>choiceAttribute</key>
		<string>selected</string>
		<key>choiceIdentifier</key>
		<string>choice_nvm</string>
	</dict>
	<dict>
		<key>attributeSetting</key>
		<true/>
		<key>choiceAttribute</key>
		<string>visible</string>
		<key>choiceIdentifier</key>
		<string>choice_umbrella</string>
	</dict>
	<dict>
		<key>attributeSetting</key>
		<false/>
		<key>choiceAttribute</key>
		<string>enabled</string>
		<key>choiceIdentifier</key>
		<string>choice_umbrella</string>
	</dict>
	<dict>
		<key>attributeSetting</key>
		<integer>1</integer>
		<key>choiceAttribute</key>
		<string>selected</string>
		<key>choiceIdentifier</key>
		<string>choice_umbrella</string>
	</dict>
</array>
</plist>
To customize the installer choices, you can create a choice changes file that allows individual installer choices to be selected or deselected. The choice changes file is a property list or XML file containing an array of dictionaries items.
Each dictionary has the following three keys:
- choiceIdentifier
Identifier for the choice to be modified (string
- choiceAttribute
One of the attribute names described below (string)
- attributeSetting
A setting that depends on the choiceAttribute (number or string)
The choiceAttribute and attributeSetting values are as follows:
- selected
(number) 1 to select the choice, 0 to deselect it
- enabled
(number) 1 to enable the choice, 0 to disable it
- visible
(number) 1 to show the choice, 0 to hide it
- customLocation
(string) path at which to install the choice
Note that there can be multiple dictionaries for the same choiceIdentifier, since there can be multiple attributes set for a single choice.
For example…


Create Choice Changes File
To create a `choiceChanges` property list (plist) or XML file that deselects installer choices in the Cisco AnyConnect installer, use the following command to same output the installer choices to a plist or XML file.
installer -showChoiceChangesXML -pkg "/path/to/AnyConnect.pkg" > /path/to/anyconnect_choicechanges.plist
Edit the `choiceChanges` file, removing all the dictionaries without the choiceAttribute “selected” and then change the attributeSetting from “1” to “0” to deselect installer choice.
Installer Choices Summary
You can simply use a tool like grep to generate a installer choices summary:
grep "selected" -A 2 -B 2
With grep the -A 2 option prints two lines of the trailing context and -B 2 prints two lines of the leading context after each match of “selected” string.
For example:
installer -showChoiceChangesXML -pkg "/path/to/AnyConnect.pkg" | grep "selected" -A 2 -B 2

		<integer>0</integer>
		<key>choiceAttribute</key>
		<string>selected</string>
		<key>choiceIdentifier</key>
		<string>choice_vpn</string>
--
--
		<integer>1</integer>
		<key>choiceAttribute</key>
		<string>selected</string>
		<key>choiceIdentifier</key>
		<string>choice_websecurity</string>
--
--
		<integer>1</integer>
		<key>choiceAttribute</key>
		<string>selected</string>
		<key>choiceIdentifier</key>
		<string>choice_fireamp</string>
--
--
		<integer>1</integer>
		<key>choiceAttribute</key>
		<string>selected</string>
		<key>choiceIdentifier</key>
		<string>choice_dart</string>
--
--
		<integer>1</integer>
		<key>choiceAttribute</key>
		<string>selected</string>
		<key>choiceIdentifier</key>
		<string>choice_posture</string>
--
--
		<integer>1</integer>
		<key>choiceAttribute</key>
		<string>selected</string>
		<key>choiceIdentifier</key>
		<string>choice_iseposture</string>
--
--
		<integer>1</integer>
		<key>choiceAttribute</key>
		<string>selected</string>
		<key>choiceIdentifier</key>
		<string>choice_nvm</string>
--
--
		<integer>1</integer>
		<key>choiceAttribute</key>
		<string>selected</string>
		<key>choiceIdentifier</key>
		<string>choice_umbrella</string>
For example, here is a choiceChanges property list file you can use to deselect installer choices within the Cisco AnyConnect installer that is supported with the centralized VPN at University of Utah:
<?xml version="1.0" encoding="UTF-8"?>
<!DOCTYPE plist PUBLIC "-//Apple//DTD PLIST 1.0//EN" "http://www.apple.com/DTDs/PropertyList-1.0.dtd">
<plist version="1.0">
<array>
	<dict>
		<key>attributeSetting</key>
		<integer>0</integer>
		<key>choiceAttribute</key>
		<string>selected</string>
		<key>choiceIdentifier</key>
		<string>choice_websecurity</string>
	</dict>
	<dict>
		<key>attributeSetting</key>
		<integer>0</integer>
		<key>choiceAttribute</key>
		<string>selected</string>
		<key>choiceIdentifier</key>
		<string>choice_fireamp</string>
	</dict>
	<dict>
		<key>attributeSetting</key>
		<integer>0</integer>
		<key>choiceAttribute</key>
		<string>selected</string>
		<key>choiceIdentifier</key>
		<string>choice_dart</string>
	</dict>
	<dict>
		<key>attributeSetting</key>
		<integer>0</integer>
		<key>choiceAttribute</key>
		<string>selected</string>
		<key>choiceIdentifier</key>
		<string>choice_posture</string>
	</dict>
	<dict>
		<key>attributeSetting</key>
		<integer>0</integer>
		<key>choiceAttribute</key>
		<string>selected</string>
		<key>choiceIdentifier</key>
		<string>choice_iseposture</string>
	</dict>
	<dict>
		<key>attributeSetting</key>
		<integer>0</integer>
		<key>choiceAttribute</key>
		<string>selected</string>
		<key>choiceIdentifier</key>
		<string>choice_nvm</string>
	</dict>
	<dict>
		<key>attributeSetting</key>
		<integer>0</integer>
		<key>choiceAttribute</key>
		<string>selected</string>
		<key>choiceIdentifier</key>
		<string>choice_umbrella</string>
	</dict>
</array>
</plist>
Changes After Modifying Choice Installs
Modifying choices install options may cause other options to appear or disappear. To verify what modifications will occur when your choice installer file is applied during installation. You can run the following command:
sudo installer -showChoicesAfterApplyingChangesXML "/path/to/anyconnect_choice_changes.plist" -pkg "/path/to/AnyConnect.pkg" -target "/path/to/target" > "/path/to/anyconnect_after_choice_changes.plist"

Compare the “choice changes” and “after choice changes” property list files and make sure you are selecting and deselecting the correct options. For example, with the Cisco AnyConnect installer the choice_vpn was deselected and after using the “choice changes” file was re-selected.
 Install with Choice Installs
Once you have created and verified your custom install choices plist, you can use it to perform the custom install with the following command
sudo installer -applyChoiceChangesXML "/path/to/anyconnect_choice_changes.plist" -pkg "/path/to/AnyConnect.pkg" -target "/path/to/target"
For example:
sudo installer -applyChoiceChangesXML "/path/to/anyconnect_choice_changes.plist" -pkg "/path/to/AnyConnect.pkg" -target "/path/to/target"
installer: Package name is AnyConnect Secure Mobility Client
installer: choices changes file '/path/to/anyconnect_choice_changes.plist' applied
installer: Installing at base path /
installer: The install was successful.
To verify that the correct optional choice installers where installed review the /var/log/install.log file. Search for PackageKit: packages which will display optional choice installers.
For example, here is log output of the default install of Cisco AnyConnect:
Feb 17 10:12:18 r-glaser-mac installd[466]: PackageKit: packages=(
"PKLeopardPackage <file://localhost/Volumes/AnyConnect%204.3.03086/AnyConnect.pkg#websecurity_module.pkg>",
"PKLeopardPackage <file://localhost/Volumes/AnyConnect%204.3.03086/AnyConnect.pkg#fireamp_module.pkg>",
"PKLeopardPackage <file://localhost/Volumes/AnyConnect%204.3.03086/AnyConnect.pkg#dart_module.pkg>",
"PKLeopardPackage <file://localhost/Volumes/AnyConnect%204.3.03086/AnyConnect.pkg#posture_module.pkg>",
"PKLeopardPackage <file://localhost/Volumes/AnyConnect%204.3.03086/AnyConnect.pkg#iseposture_module.pkg>",
"PKLeopardPackage <file://localhost/Volumes/AnyConnect%204.3.03086/AnyConnect.pkg#nvm_module.pkg>",
"PKLeopardPackage <file://localhost/Volumes/AnyConnect%204.3.03086/AnyConnect.pkg#umbrella_module.pkg>"
)
And here is the log output of the install using a choice installs file:
Feb 17 09:59:35 r-glaser-mac installd[466]: PackageKit: packages=(
	    "PKLeopardPackage <file://localhost/Volumes/AnyConnect%204.3.03086/AnyConnect.pkg#vpn_module.pkg>"
	)
Customize Settings
- Host Settings
Default VPN Host
To set a default VPN host file that will be displayed on launch of the Cisco AnyConnect application.
 You create a XML file located at:
/opt/cisco/anyconnect/profile/
For example:
/opt/cisco/anyconnect/profile/vpnaccess_utah_edu.xml
Change hostname between HostName keys <HostName>vpnhost.domain</HostName>.
For the University of Utah, use the following content:
<?xml version="1.0" encoding="UTF-8"?>
<AnyConnectProfile xmlns="http://schemas.xmlsoap.org/encoding/">
<ServerList>
     <HostEntry>
          <User></User>
          <SecondUser></SecondUser>
          <ClientCertificateThumbprint></ClientCertificateThumbprint>
          <ServerCertificateThumbprint></ServerCertificateThumbprint>
          <HostName>vpnaccess.utah.edu</HostName>
          <HostAddress></HostAddress>
          <Domain></Domain>
          <Group></Group>
          <ProxyHost></ProxyHost>
          <ProxyPort></ProxyPort>
          <SDITokenType></SDITokenType>
          <ControllablePreferences>
               <LocalLanAccess></LocalLanAccess>
          </ControllablePreferences>
     </HostEntry>
</ServerList>
</AnyConnectProfile>
Disable Auto Updates
Depending on your environment and your relationship with the VPN appliance administrator, you might want to disable Cisco AnyConnect application from auto updating.
Edit the XML file located at:
/opt/cisco/anyconnect/AnyConnectLocalPolicy.xml
Change boolean between “BypassDownloader” keys:
- Enabled: <BypassDownloader>true</BypassDownloader>
- Disabled: <BypassDownloader>false</BypassDownloader>
For example:
<?xml version="1.0" encoding="UTF-8"?>
<AnyConnectLocalPolicy xmlns="http://schemas.xmlsoap.org/encoding/" xmlns:xsi="http://www.w3.org/2001/XMLSchema-instance" xsi:schemaLocation="http://schemas.xmlsoap.org/encoding/ AnyConnectLocalPolicy.xsd" acversion="4.3.03086">
    <BypassDownloader>true</BypassDownloader>
    <ExcludeFirefoxNSSCertStore>false</ExcludeFirefoxNSSCertStore>
    <ExcludeMacNativeCertStore>false</ExcludeMacNativeCertStore>
    <ExcludePemFileCertStore>false</ExcludePemFileCertStore>
    <ExcludeWinNativeCertStore>false</ExcludeWinNativeCertStore>
    <FipsMode>false</FipsMode>
    <RestrictPreferenceCaching>false</RestrictPreferenceCaching>
    <RestrictTunnelProtocols>false</RestrictTunnelProtocols>
    <RestrictWebLaunch>false</RestrictWebLaunch>
    <StrictCertificateTrust>false</StrictCertificateTrust>
    <UpdatePolicy>
        <AllowComplianceModuleUpdatesFromAnyServer>true</AllowComplianceModuleUpdatesFromAnyServer>
        <AllowISEProfileUpdatesFromAnyServer>true</AllowISEProfileUpdatesFromAnyServer>
        <AllowServiceProfileUpdatesFromAnyServer>true</AllowServiceProfileUpdatesFromAnyServer>
        <AllowSoftwareUpdatesFromAnyServer>true</AllowSoftwareUpdatesFromAnyServer>
        <AllowVPNProfileUpdatesFromAnyServer>true</AllowVPNProfileUpdatesFromAnyServer>
    </UpdatePolicy>
</AnyConnectLocalPolicy>
- User Settings
The following user settings modifications reference the XML file located at:
~/.anyconnect
Default VPN Host
To set a default VPN host file that will be displayed on launch of the Cisco AnyConnect application.

Change hostname between HostName keys <HostName>vpnhost.domain</HostName>.
Default User
To set a default user to display on on launch of the Cisco AnyConnect application.

Enter the username between DefaultUser keys <DefaultUser>MyuNID</DefaultUser>.
Start VPN When AnyConnect is Started
To start VPN connection when Cisco AnyConnect application is launched.

Change boolean between AutoConnectOnStart keys:
- Enabled: <AutoConnectOnStart>true</AutoConnectOnStart>
- Disabled: <AutoConnectOnStart>false</AutoConnectOnStart>
Minimize AnyConnect on VPN Connect
To minimize the Cisco AnyConnect application windows on VPN connection:

Change boolean between MinimizeOnConnect keys:
- Enabled: <MinimizeOnConnect>true</MinimizeOnConnect>
- Disabled: <MinimizeOnConnect>false</MinimizeOnConnect>
Allow Local (LAN) Access When Using VPN
To allow local network access when using VPN.

Change boolean between LocalLanAccess keys:
- Enabled: <LocalLanAccess>true</LocalLanAccess>
- Disabled: <AutoConnectOnStart>false</AutoConnectOnStart>
Currently, this option is not allowed on our campus because the concern increased likelihood of compromised non-managed systems that could impact campus clients/systems and data.
Block Connection to Untrusted Servers
To allow local network access when using VPN.

Change boolean between BlockUntrustedServers keys:
- Enabled: <BlockUntrustedServers>true</BlockUntrustedServers>
- Disabled: <BlockUntrustedServers>false</BlockUntrustedServers>
Distributing Customized Settings
You have multiple options for distributing the customized settings outlined previously. Since the files are XML files versus property lists files, you can’t use configuration profiles to make the settings changes. You could script the desired modifications with your favorite scripting language (i.e. bash, perl, python, ruby, etc.). Or you could create an installer that distributes a payload with the associated files and metadata (privileges, owner, etc.) or a payload-free installer that simply runs the script that makes the desired modifications . Since Installer packages are currently Apple’s preferred way to install software and it is used by most if not all Apple system management software solutions (i.e. Apple Remote Desktop, Jamf Pro, FileWave, Absolute Manage, munki, puppet, chef, ansible, etc.).
For example, if you management or technical ability needs are low and you have few Apple systems, you could use Apple Remote Desktop to install software and customizations.

If your management needs are greater or number of Apple system increases, I would recommend looking into more advanced and full-featured commercial or open source solutions that meet your enterprises requirements.
To create a installer with your settings customizations, you have multiple options like command line options: pkgbuild, productbuild , munki-pkg & luggage; or graphical options like Whitbox Packages or Casper Composer. The solution you choice depends on many factors like your technical abilities or time, implemented management solution and individual project or need.
For example, these are the steps to create an installer with command line pkgbuild of the custom VPN hostname:
Create Installer Projects Folder
mkdir -p ~/Projects/cisco_anyconnect_hostname/
Create Cisco AnyConnect File with VPN Hostname
For the University of Utah, use the following content:
<?xml version="1.0" encoding="UTF-8"?>
<AnyConnectProfile xmlns="http://schemas.xmlsoap.org/encoding/">
<ServerList>
     <HostEntry>
          <User></User>
          <SecondUser></SecondUser>
          <ClientCertificateThumbprint></ClientCertificateThumbprint>
          <ServerCertificateThumbprint></ServerCertificateThumbprint>
          <HostName>vpnaccess.utah.edu</HostName>
          <HostAddress></HostAddress>
          <Domain></Domain>
          <Group></Group>
          <ProxyHost></ProxyHost>
          <ProxyPort></ProxyPort>
          <SDITokenType></SDITokenType>
          <ControllablePreferences>
               <LocalLanAccess></LocalLanAccess>
          </ControllablePreferences>
     </HostEntry>
</ServerList>
</AnyConnectProfile>
Create Installer
cd ~/Projects
kgbuild --root cisco_anyconnect_hostname --identifier edu.utah.lib.vpn-custom-hostname --version 1.0 --install-location /opt/cisco/anyconnect/profile "AnyConnect Custom VPN Hostname.pkg"
pkgbuild: Inferring bundle components from contents of cisco_anyconnect_hostname
pkgbuild: Wrote package to AnyConnect Custom VPN Hostname.pkg
Test Installer
Before distributing the installer into production, test and verify that it is working correctly on a test system. If works correctly you can use your system management solution to distribute it to your fleet.
Duo Security
The University of Utah implemented two-factor authentication (2FA) for accessing secure web applications used by staff & faculty Two-factor authentication enhances the security of your online accounts by using your landline phone, mobile phone, or key fob to verify your identity. Should your password be compromised by a third party, the additional factor provided by Duo will keep your account safe. Duo Security works with the Cisco AnyConnect VPN Client to strengthen the security of staff & faculties connection to university.

Multi-factor authentication (MFA) is a method of computer access control in which a user is only granted access after successfully presenting several separate pieces of evidence to an authentication mechanism – typically at least two of the following categories: knowledge (something the user knows), possession (something the user has in their possession), and inherence (something they are, a finger print or retina pattern). Two-factor authentication is a method of confirming a user’s claimed identity by utilizing a combination of two different components. Two-factor authentication is a type of multi-factor authentication.
A good example from everyday life is the withdrawing of money from a cash machine; only the correct combination of a bank card (something that the user possesses) and a PIN (personal identification number, something that the user knows) allows the transaction to be carried out.
At the University of Utah, our campus VPN supported the built-in macOS and iOS IPSec for VPN where we created a configuration profile to quickly setup and ease VPN setup for campus student, staff and faculty. With the integration two-factor authentication (2FA) using Duo Security, support for IPSec for VPN was no longer supported due to security and support concerns.

Instead student, staff and faculty using macOS and iOS would need to use the Cisco AnyConnect software to use the centralized campus VPN. All staff & faculty are required to use two-factor authentication (2FA) for the centralized campus VPN. Offshore vendors, e-prescribers for controlled substances, and those already using RSA are required to use RSA SecurID for 2FA. All other current employees are required to use Duo Security.

- Enroll Device
Follow the process for Duo Security to enroll the desired authentication method (mobile device, tablet, or landline). Note, in rare circumstances, an exception may be granted by university administration for users who feel they must use a landline as their primary method.

See Duo FAQ for more details on the University of Utah policies and implementation details.

- AnyConnect & Duo Security
Mac
After installing, customizing and configuring your Cisco AnyConnect application. Launch the application, at the University of Utah you should see the following window:
If you didn’t implement the customizations mentioned earlier in this post, you may need to enter the VPN host name, vpnaccess.utah.edu then click the “Connect” button. Then you should see the following window:

Group
The group gives you three options: 2FA-DuoSecurity, 2FA-RSASecurID and Single-Factor. Depend on the position of the staff or faculty your would choose either “2FA-DuoSecurity” or “2FA-RSASecurID”. You should only use “2FA-RSASecurID” group if you are an offshore vendor, e-prescribing controlled substance or accessing Clinical servers; else use “2FA-DuoSecurity” group.

If you are a student you select “Single-Factor” group.
Username & Password
Next, enter your username & password. At the University of Utah, we term the centralized username as uNID or University Network ID.

Passcode
The passcode field you have multiple options:
- Code
The passcode can be a code generating with the Duo Mobile application, sent via SMS, generated by a hardware token or provided by an campus 2FA administrator.

- Push
Push login request to mobile phone, supports iPhone, Android and Windows phones. Just review the request and tap “Approve” to login.

- Push[N]
Push login request to alternate mobile phone or tablet. For example, enter “push2” for 2nd, “push3” for 3th, etc.
- SMS
Get a new batch of SMS passcode’s
- Phone
Authenticate via a landline phone callback

iOS
The iOS Cisco AnyConnect offers similar functionality as the macOS, but uses “Second Password” title for the “Passcode” field.

No Comments